SmarterMail Installation
Last updated
Was this helpful?
Last updated
Was this helpful?
Download the latest version of Smartermail below:
Once you have downloaded the latest version to your windows server you will then following the steps below:
Place the EXE or MSI file on the server that you are wanting to install Smartermail on.
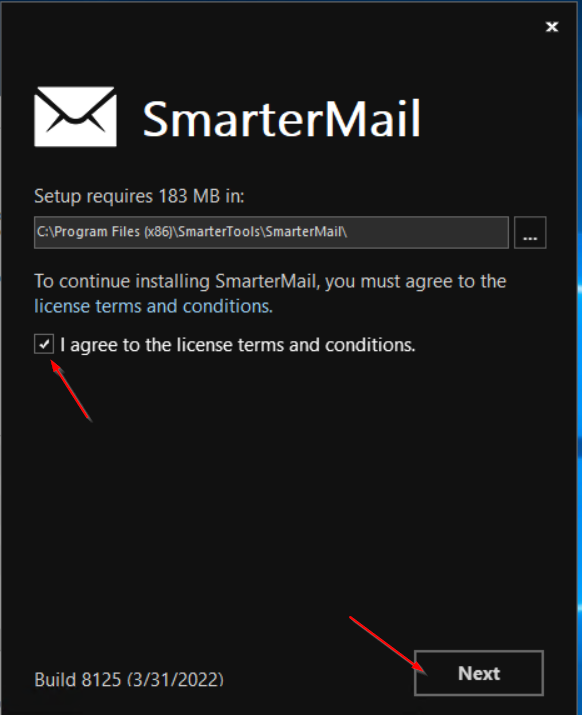
Run the installer.
Check the box to agree to the license terms.
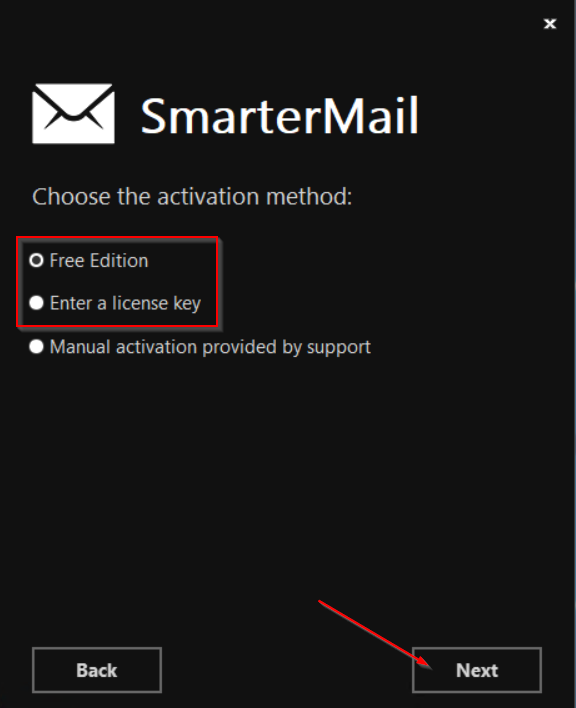
If you have a license key choose “Enter a license key”. If not, then choose “Free Edition”.
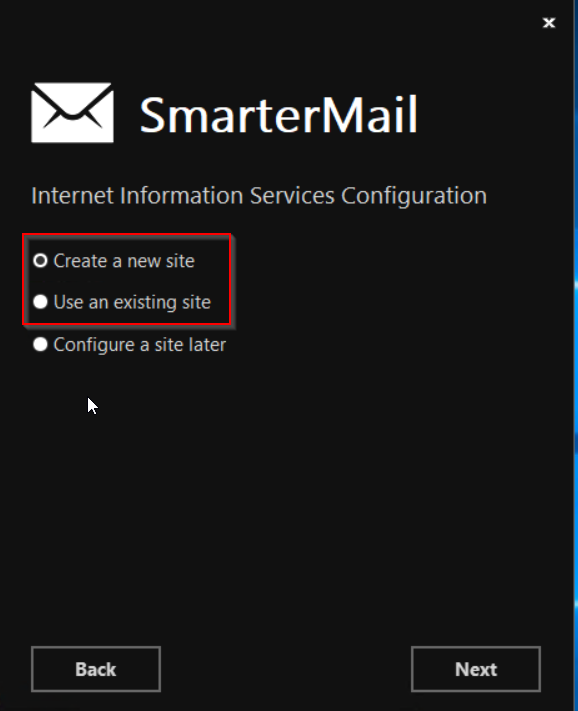
If you have NOT created a site in IIS for Smartermail, then choose “Create a new site”. If you have a site made in Smartermail specifically for Smartermail choose “Use a existing site”.
You shouldn’t need to pre-create a site in IIS for Smartermail unless the installer is not allowing you to create a new site.
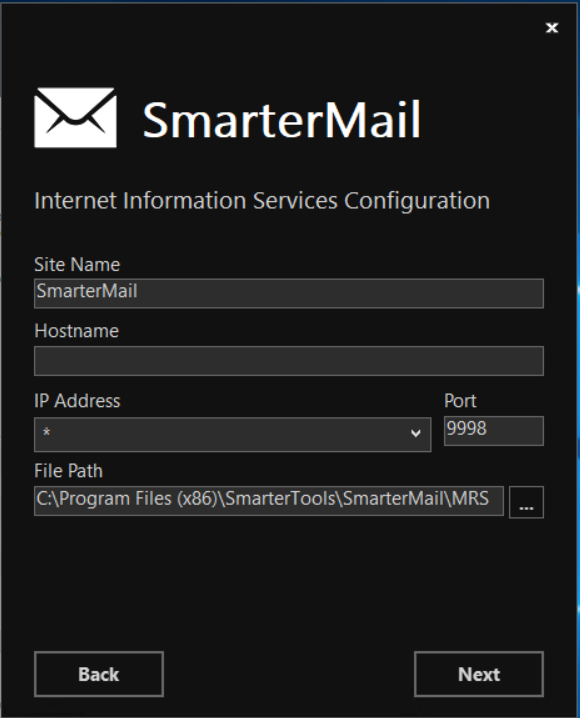
If you chose “Create a new site”, then you should be able to leave things as is and click “Next”.
if you want to change the name of the site or add a hostname then you can certainly do that.
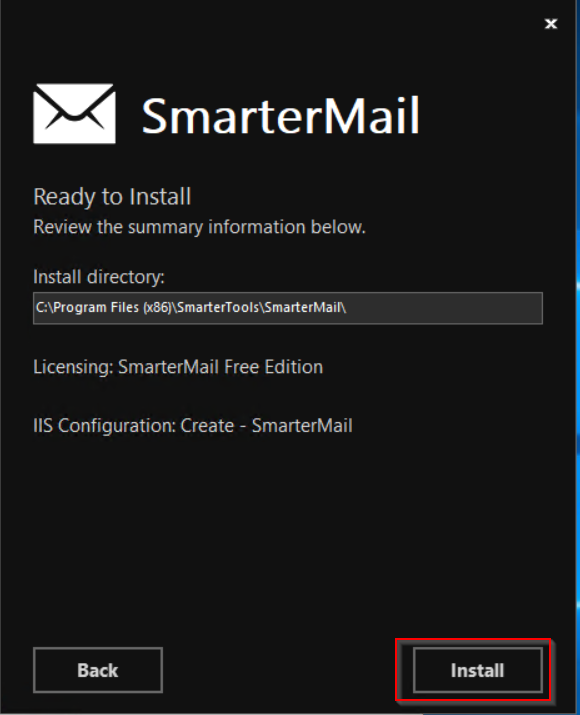
Click “Install”.
Smartermail has now been installed.
On the server that you have installed Smartermail, Open up any browser other than IE and navigate to http://127.0.0.1:9998/
Enter the username, password, and Data path, then click “Finish”.
Now open “Windows Firewall”
Create a new inbound rule, choose type “Program”, then “Next”.
Choose “This program path” and link to the following path:
%ProgramFiles% (x86)\SmarterTools\SmarterMail\Service\MailService.exe
Leave the rest of the options at their defaults and name the rule “Smartermail”


